

Description
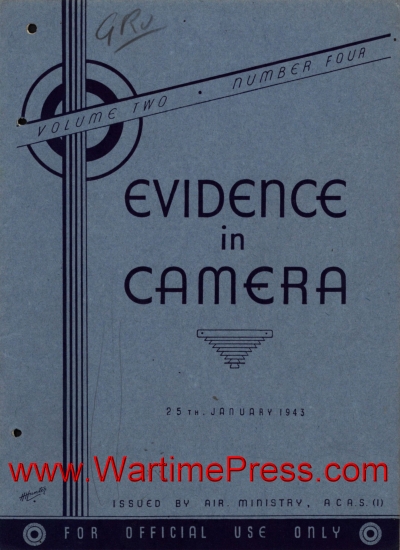
Evidence in Camera – Volume 2, Number 4 · 25th January 1943
Publisher: Air Ministry, A.C.A.S.(I) · Printed by C. & E. Layton Ltd., London E.C.4
Pages scanned: 28
- “No Careless Talk” Cartoon — A humorous illustration by Silverton depicting an RAF sergeant releasing pigeons with the caption “—and remember NO CARELESS TALK!”
- Narvik Class Destroyer, Type I — Aerial View — Vertical aerial photograph of a German Narvik Flotilla Class destroyer underway, showing a long wake, representing Type I with five 5-inch guns on single mountings.
- Narvik Class Destroyer, Type II — Profile and Plan Diagrams — Side elevation and top-down silhouette drawings of the Type II Narvik Class destroyer, which uniquely carries a twin turret forward.
- Narvik Class Destroyer, Type II — Aerial View at Dock — Oblique aerial photograph of a Type II Narvik Class destroyer moored at a harbour, with an arrow identifying the vessel.
- Narvik Class Destroyers, Types III and IV — Profile and Plan Diagrams — Side and plan-view silhouette drawings illustrating the layout of the most common Narvik Class variant.
- Narvik Class Destroyers, Type III — Two Vessels Aerial View — Aerial photograph of two Type III destroyers at sea, labelled A and B, contrasting short- and long-barrelled 5-inch gun fits.
- Narvik Class Destroyer, Type IV — Aerial View — Aerial photograph of a single Type IV Narvik Class destroyer at sea, showing its distinctive two-forward, two-aft gun arrangement.
- Roeder Class Destroyer — Aerial View at Dock — Aerial photograph of the sole surviving Roeder Class destroyer, Karl Galster, moored alongside a quay.
- Maas Class Destroyer — Profile and Plan Diagrams — Side elevation and top-down silhouette drawings of the Maas Class destroyer, showing its uniform single-mounting gun arrangement.
- Maas Class Destroyer — Aerial View — Aerial photograph of a Maas Class destroyer at speed, showing the staggered light AA gun arrangement on the after funnel platform.
- Elbing Class Destroyer — Profile and Plan Diagrams — Side elevation and top-down silhouette drawings of the smaller Elbing Class, illustrating its distinctive four-gun layout.
- Elbing Class Destroyers — Fitting Out at Elbing — Aerial photograph of three Elbing Class destroyers in the final stages of fitting out at the Elbing shipyard.
- Tjerk Hiddes Class Destroyer — Aerial View — Aerial photograph of the captured ex-Dutch destroyer Tjerk Hiddes moored at Rotterdam after commissioning into the German Navy.
- Tjerk Hiddes Class Destroyer — Profile and Plan Diagrams — Side elevation and top-down silhouette drawings of the Tjerk Hiddes Class, showing its modified three-gun armament.
- Attack on Genoa — Pre-Raid Aerial View — Vertical aerial photograph of east Genoa south of Stazione Brignole taken at 2159 hours, before the bombing began, with a searchlight track visible.
- Attack on Genoa — Flares Dropped — Aerial photograph of the same area five minutes later, showing multiple bright tracks of burning flares across the city.
- Attack on Genoa — Incendiary Bomb Sticks — Aerial photograph taken at 2210 hours showing sticks of incendiary bombs (A and B) falling among the mass of light from burning flares.
- Attack on Genoa — Fires Established — Aerial photograph taken at 2240 hours recording fire tracks and large fires in the dock area, with flares no longer visible.
- Hibernia Synthetic Oil Plant, Scholven — Early Cover — Large-scale vertical aerial photograph of the Hibernia A.G. plant at Scholven in the Ruhr, showing the coal mine/power station (A) and the synthetic oil plant (B) before camouflage was applied.
- Scholven Oil Plant — Camouflage Applied — Aerial photograph showing the plant now covered with overhead netting decorated with dummy roads and houses, with the connecting road tunnelled under netting.
- Decoy for Scholven Synthetic Oil Plant — Aerial photograph of the elaborate decoy installation at Dorsten I (Teigler), constructed in lath, canvas, and paint to simulate the Scholven works.
- Berlin Railway Stations — Aerial View — Large vertical aerial photograph identifying the Potsdamer (A) and Anhalter (B) passenger stations, goods stations (C, D), engine sheds (E), and the Stadtbahn line (F).
- Marseilles Harbour — Overview with Basin Labels — Annotated aerial photograph of the western Marseilles dock area identifying Bassin Mirabeau, President Wilson Basin, Bassin de la Pinède, and the Repairing Basin.
- Marseilles Harbour — Railway Flak Defences — Aerial photograph of the dock area taken shortly after German occupation, showing railway flak guns deployed to the north and north-east of the Repairing Basin.
- Marseilles — Bassin National and Joliette — Annotated aerial photograph of the northern Marseilles port showing Bassin National, Bassin de la Gare Maritime, Bassin de la Joliette, and Port Vieux.
- Marseilles — Heavy Railway Flak Troop — Aerial photograph of the Joliette quayside showing a heavy railway flak troop with four heavy guns (A), two light guns (B), a command post (C), and light flak in the Cattlepen sidings (D).
- Royal Dutch Steel Works, IJmuiden — Bombing Attack — Aerial photograph taken during the Ventura aircraft attack on 9 January 1943, showing bombs bursting on the blast furnaces (A), coke oven plant (B), and railway sidings (C).
- Ciné Film — Boston Aircraft Approaching Target — Still frame from a ciné gun camera showing a Boston bomber of Bomber Command flying low over the sea towards IJmuiden.
- Ciné Film — Approach to IJmuiden Coastline — Enlarged frame showing the Dutch coastline as seen from a low-flying Boston during the run-in to the steel works.
- Ciné Film — Steel Works Rooftops, Frame 1 — Low-level ciné frame looking across the rooftops of the Royal Dutch Steel Works as the attacking Boston runs up to the target.
- Ciné Film — Steel Works Rooftops, Frame 2 — Low-level ciné frame taken moments later showing the aircraft passing directly over the industrial buildings of the steel works.
- Ciné Film — Steel Works Rooftops, Frame 3 — Final low-level ciné frame capturing the plant structures at very close range as the Boston completes its attack run.
- Ju 52s at Heraklion Aerodrome, Crete — Vertical aerial photograph of Heraklion aerodrome showing a large concentration of Junkers Ju 52 transport aircraft alongside Ju 88s, He 111s, a Go 242 glider, and Italian S.M.82 transports.
- Ju 52s at Merville Airfield, France — Aerial photograph of Merville runway showing several Ju 52s on the ground, with the characteristic double-wing flap shadows visible in two cases.
- Ju 52 Seaplanes at Trondheim/Hommelvik — Aerial photograph of the Trondheim/Hommelvik seaplane base showing Ju 52 floatplane variants, two carrying civil markings.
- German Balloon Barrage — Wilhelmplatz, Berlin — Ground-level photograph of barrage balloons being tested in Wilhelmplatz outside the Reich Chancellery, Berlin.
- German Balloon Barrage — Lustgarten, Berlin — Ground-level photograph of barrage balloons flying over the Lustgarten in Berlin, taken during the same test series.
- Barrage Balloon at Rostock — Deflated with Equipment — Aerial reconnaissance photograph of a deflated barrage balloon at Rostock showing the hauling winch emplacement (A) and a light gun site (B).
- Barrage Balloon at Rostock — Flying at Altitude — Aerial photograph of a Rostock barrage balloon flying at approximately 265 feet, with the hauling winch (A) and crew quarters (B) visible on the ground.
- Large Barrage Balloon at Rostock — Close-Hauled — Aerial photograph of an unusually large barrage balloon (approximately 108 feet in length) close-hauled at Rostock.
- Balloon Barrage at St. Nazaire — Aerial photograph of the St. Nazaire port area showing multiple barrage balloons flying at varying heights.
- Balloon Barrage at La Pallice — Aerial photograph of the harbour at La Pallice showing the balloon barrage incorporated into the port’s defensive network.
- Trondheim/Lade Aerodrome — Vertical aerial photograph of the German-built Trondheim/Lade aerodrome, identifying the main hangar (A) and open aircraft shelters (B).
- CAM Ship in Allied Convoy — Broadside View — Photograph of an Allied convoy at sea featuring a Catapult Aircraft Merchantman (CAM ship) equipped with a catapult and Hurricane fighter.
- CAM Ship — Bow View — Close-range photograph of the CAM ship seen from ahead, showing its catapult and deck equipment in detail.
- Problem Picture — Unidentified Aerial View — Aerial photograph of an unidentified town or installation, posed as a reader challenge to identify the subject before the answer appears in the next issue.
- Decoys Situated Round Target Areas No. 5 — Cologne — Full-page composite map and photographic chart showing seventeen decoy sites surrounding Cologne, each keyed to a circular inset aerial photograph identifying the type of decoy.